The wide ranging experiences of someone who lives in the Australian bush in a knocked together tin shed with a heap of animals and still manages to hold down a job, study full time and raise a family.
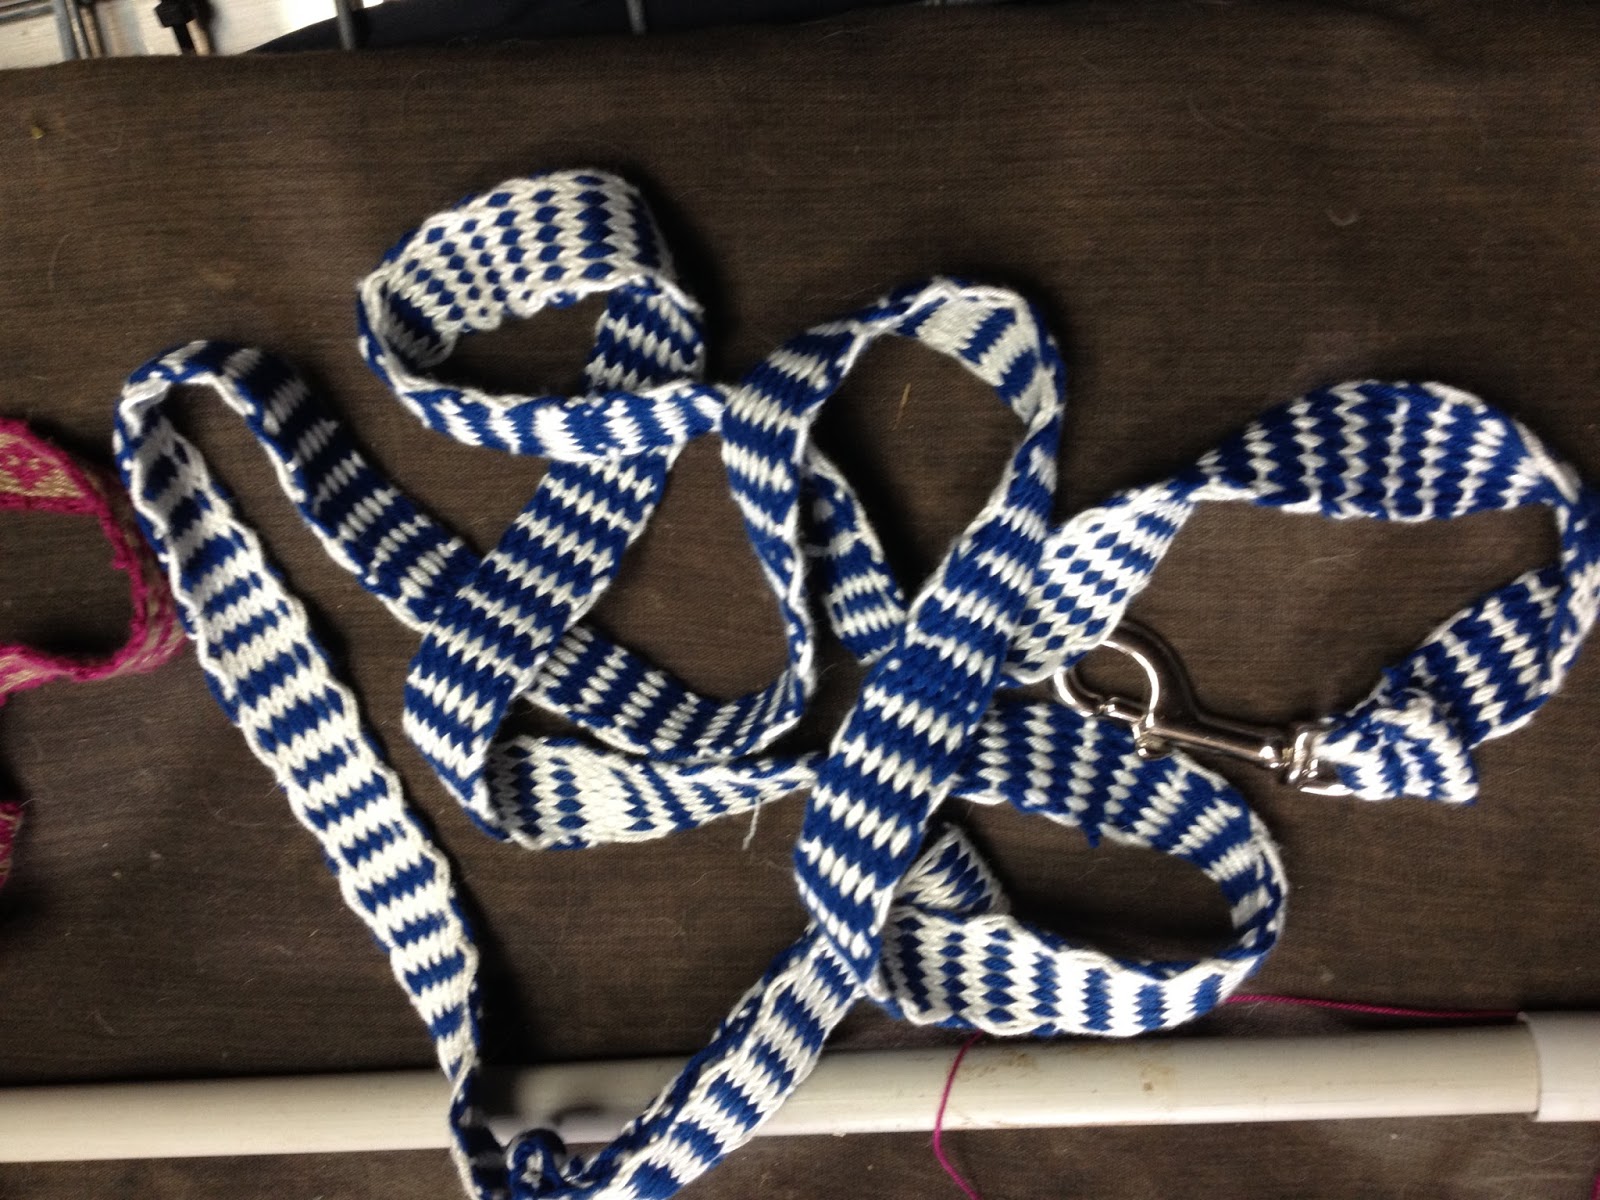
Another journey of exploration for me... card weaving. Also known as tablet weaving, this art has been used to make straps and decorative edges for centuries (there is nothing new under the sun). I first read about it while researching naelbinding (or needle binding) and other Viking textile methods. I have yet to perfect the art of making socks with a horn needle and wool (naelbinding) but I did give tablet weaving a go. I made a short lead for Shaun and a long lead for Sid and am now in the process of making a collar and lead set for my daughter's dog; Val.
The basics sound deceptively easy; just make some cards with a hole in each corner. I used old milk bottles to make mine, the plastic is thin but strong and I can write on them with a permanent marker. My cards are two and a half inches square with the holes a half inch in from the corner.
Then thread them up according to the draft pattern. I decided to start with a really simple one that gives ovals.
The warp (the long bits of yarn you weave through) is tied to two fixed points (or one to your belt and one to your toe) and away you go.
Simply turn the cards forwards or backwards (depending on the pattern) to open new sheds (the gap you put the weft [the bits of yarn that goes from side to side in weaving] through).
I have learned some lessons on this journey...
My cards, made from cut up milk bottles
First and most importantly- don't let your warp threads get twisted or you end up with a huge mess and a red face (possibly high blood pressure too). Eventually I figured out that cutting each card's worth of warp and pegging them individually to a coat hanger was quicker than cutting big numbers of each colour then sorting them out later.
My first mess of warp strings...waiting to be sorted out.
Now I just cut them and peg the until I am ready to thread.
Secondly- It is much easier to move when you aren't tied to a door, or life is easier with a loom. I made a simple frame for my card weaving warp after my first weaving session. This simple loom is made from PVC pipe and 90 degree angle joiners. It works really well and I no longer take ten minutes to get free of the warp so I can answer the phone, check on a squawk from outside or go to the loo.
A really simple card weaving loom
Thirdly- keep your cards all together with a clip when you advance the warp to weave a new bit. If you don't you could end up having to untangle a pile of warp threads all over again (I did).
This handy clip keeps the cards all aligned and neat when I'm not weaving and when I move the warp up.
Lastly- be prepared to be endlessly awed by the beautiful bands you can make with just a simple warp and some bits of plastic.
Shaun's lead on the loom
The finished lead, I love the patterns and it is so strong.
The second attempt at a lead. I made a few mistakes in the card turning, but it's strong and useful anyway.
Sid loves it, because it's longer than Shaun's and he can graze as we walk.
The third attempt. This will be part of a collar and lead set for Val; my daughter's dog.
As you can see I'm far from an expert, my selvages are still messy and I miss threaded one card on the latest warp (the pink dot in the green circles), but I am getting better at it and enjoying the process. Life is good when I can learn new things.
Oh and Book Book (my youngest daughter's hen) is sitting on a nest in an old chest of draws, no...not in the house. She will hatch some lovely champagne frizzles soon and I will have chickens to watch again.
For a while now I have wanted a loom wide enough to weave material for clothes making. At last I have saved up enough to buy the materials I need to build one. My first step was to rough (very rough) out a design for the loom;
I want the weaving width to be about 70 cm. So I bought myself a 70 cm rigid heddle (a frame which lifts the warp threads up and down to facilitate weaving) and designed the rest of the loom around it.
My rough design.
The YouTube clip below inspired my design, but I added a way to wind warp from the back beam to the front beam so I could weave longer pieces.
The rigid heddle replaces both the shed stick and the string heddles used in the clip. To be able to use it I will have to add holders at the side which hold the heddle in either the top, neutral or bottom positions, as you can see in the clip below;
This is the design I eventually came up with.
This is the heddle guide in action.
This is the rigid heddle; the entire loom is built around this piece of equipment.
I measured the frame pieces and made sure the heddle would fit nicely inside it.
Then I cut the frame pieces using this nifty gadget I found in the shed.
Rabbito joined me for the cutting part and offered sage advice like "OOOh, mind your fingers"
Puddle duck looked on suspiciously and made loud quacking noises.
I used these corner bracket thingies to hold the frame together.
The heddle fits perfectly and the frame is strong. Note that the side pieces are positioned inside the top and bottom pieces so that the pressure of the warp will not be only on the brackets.
I then measured the 'legs' to be the height I wanted as per the clip instructions and cut them on the handy gadget.
These two bits are my warp and cloth beams. I will explain them in more detail below.
This diagram might help you understand what I am on about.
The warp and cloth beams on my loom are not attached as they are on a normal rigid heddle loom. Instead they rely on the warp (and some shoe laces) to hold them to the frame. On most looms the beams act as storage for the warp and cloth as well as being a tensioning device (keeping the warp tight enough to weave on). On my loom the two beams will be bolted together (as in the original design clip) to act as a tensioning device and the two bits of PVC pipe will act as the rollers for the warp and cloth. The rollers have an apron rod attached (to anchor the beginning and end of the warp) and holes drilled at intervals around the edges to align with a hole in the beam so pegs (nails in my case) can be used as both a crank handle and pawl so the warp can be moved through the loom while still maintaining warp tension.
The long bolt things pass through the beams and the wing nuts are used to fine tune the tension.
This is the loom with it's first warp. You can see how the tension device works.
A closer look at the beams with their PVC rollers.
This is the beginning of my next project; a woven bag.
Using the rigid heddle is so easy and quick. I love my new loom and I love that I made it myself (with minimal help from my partner). If you are wanting a quick to build, cheap loom this is the design for you. In total this loom cost me $120 to build, including the rigid heddle.
The scarf is finished.In the end I used a hem stitch to secure the warp. It turned out a bit bulkier than I like, next time will be better.
I am extremely happy with the weaving though.
My interest (or obsession) in a new craft is often blocked by a lack of funds to buy or build the equipment I need to explore it, but I never let that stop me. My current obsession is weaving. I love the feel of hand woven material and it is such a useful skill. However....looms range from expensive to 'you've got to be kidding me!' so I have as usual sourced some make-it-yourself websites and such. I came across the clip below and decided I love the design so much I have to make one (with a few modifications of course).
The basics of loom design come down to having something to hold the warp taut (the warp is the threads that run up and down the loom) and a system for lifting warp threads in a specific order to pass the weft through (the weft are the threads which run from side to side). After that the designs are all refinements.
In the mean time.....I have an old and broken teaching loom. I have warped it up with recycled fingering weight yarn that I bought from a Lifeline shop, and decided to try my hand at making a scarf (classic beginners project). To add a degree of interest, and because I have no idea what I'm doing, I decided to make the scarf using a Brooks Bouquet stitch pattern (See the clip below).
My pattern is 19 picks (rows) of tabby weave (plain weaving) and one row of Brooks Bouquet stitch and repeat.
I plan to finish the ends using a hem stitch and have a plain (yellow) but elegant (hopefully) scarf to wear to work next winter.
This is my progress so far;
So far, it's been a lot of fun and I can't wait to build my loom. I am saving up for the materials.