The wide ranging experiences of someone who lives in the Australian bush in a knocked together tin shed with a heap of animals and still manages to hold down a job, study full time and raise a family.
Stage four of the Hugelkultur beds has not yet been completed, but stages one, two and three are producing lots of food. The beds look like a jungle with plants fruiting, seeding and new plants emerging, there is a good mix of vegetables and flowers too. At the moment everything growing in these beds are annuals as I have plans to top up the soil at some point and I don't want to move perennial plants to do it.
The jungle on the right are the Hugelkultur beds, the potato towers can be seen on the left, against the fence and the whole floor is layered with cardboard. The chooks stare longingly through the fence at this little oasis of green.
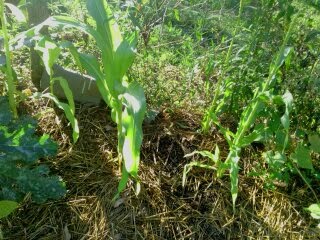
The corn is doing well in stage three, but there will only be enough for one meal from this tiny planting. I need to put more in, looks like another bed building day is required.
The zucchini are producing lots of fruit and providing shelter for eggplant seedlings.
Green and purple sprouting broccoli are still producing enough heads to feed us.
Roma tomatoes are giving us enough vine ripened fruit to qualify as a glut.
Good old silverbeet just keeps on giving, although only one plant remains of the original three; the other two have gone to seed. The climbing beans are picking and the second lot of bush beans are almost to flowering now.
The amaranth towers above it all and provides some colour to the scene as it seeds. After collecting seed from it for more plantings, I will give the seed heads to the chooks.
I am really pleased with the Hugelkultur method of building garden beds; it retains moisture, it is an attractive looking bed, it makes piles of rotting wood useful and it encourages me to build new bed space. I will be continuing to build more beds in the future (as time permits).
This is me, mowing the lawn. We put up an electric fence around all the stuff we don't want them to eat first. Sheep are nature's mowers and whipper snippers.
The seedlings are up in the trailer bed in which I am trialing square foot gardening. The beans are towering above everything else but most of the seeds have sprouted.
I have taken the advice of Mel Bartholomew and thinned the seedlings to the appropriate number and spacing per square foot, it caused me great pain to pull out good seedlings and volunteer plants from the last crop so I hope it pays off.
The bush beans are growing so fast they will be taller than the strawberries by tomorrow.
You can just see the carrots coming up.
The lettuce is looking healthy inside it's square.
The Tokyo Bekana is up, and it needed thinning.
I am watering the entire bed at a rate of 10 litres per day, I scoop out the water from our showers and use it to water the whole garden. When the seedlings have all grown a set of true leaves I will mulch between them with a fine mulch like dried grass clippings or chaff to help retain moisture in the soil.
I am now wondering if I could combine square foot gardening with my Hugelkultur beds to make use of the best qualities of both methods, or would it be better to use the Hugelkultur beds for large vegetables like zucchini, brassicas, corn and tomatoes and use the square foot gardening bed for small vegetables that can be grown intensively. What do you think?
I let the Salmon Faverolles out for a run in the yard for the first time this morning; they were so excited and happy to be treated like 'big chooks'. There are only seven of the original ten left; all three died from the same mystery Marek's like disease we seem to have acquired. Treatment with St John's Wort tincture prolonged the life of one chick but he ultimately died and the other two were fine one night and dead the next morning with the characteristic neck drawn back, splayed leg posture.
The seven remaining chicks are growing fast and have reached that awkward adolescent stage between chick and chook when they are scruffy and disproportionate to look at, but these chicks somehow manage to make that stage look cute (I really am in love).
In their pen, waiting to be big chooks.
Three days later, they are big chooks and the pen is open.
Foraging for bugs with mum.
I will let them out for a few hours every day for a few weeks to let them learn to forage and enjoy being chooks. We will need to build them a pen of their own soon as I am a bit worried that my cross breed flock will be too aggressive for them; they really are gentle and docile chooks.
The trailer bed has been planted with broad beans, snow peas, lettuce, beetroot, strawberries and calendula as my late winter/early spring crops. Now all those crops are finished so it's time to replant.
The broad beans produced very well.
The calendula provided flower petals for oinitment, seeds for planting and looked pretty too.
The lettuce and strawberries grew really well together but now the lettuce has gone to seed.
Square Foot Gardening
I have been reading about square foot gardening lately and I thought I would give it a go in the trailer bed because the size of the trailer can be divided into 24 neat square foot beds.
I used wool to mark the beds out; not a long term solution, but it will do for the first planting. I later removed the calendula, but decided to leave the strawberries.
The idea is to plant a given number of plants in a square foot of garden space. The beds need to be easily accessible and it's an advantage to have some trellis space. It's amazing how many varieties of plants can be squeezed into that little trailer bed using this method.
This method of gardening was pioneered by Mel Bartholomew, who must have a good mathematical mind.
This chart gives a planting guide for lots of common vegetables.
I planned the planting of my trailer bed using an online planning tool which made the planting much easier. Then I got to work planting the bed.
My November planting plan for the trailer bed (for some reason it shows the planting date as the date I downloaded the plan; the real planting date is 17th November 2013).
I dug up each square, added compost and a sprinkle of blood and bone and planted the required number of seeds in the square in the advised pattern.
The whole bed looks neat and tidy again. I put the shad sheet back on until all those seeds sprout then I will mulch the bed and take off the shade.
You guessed it.....as I am largely immobile due to my knee injury I decided to go through my photos for the last few weeks and update all the posts I planned but didn't get to.
Carrot towers
The carrot towers have been disappointing so far; the carrots haven't grown at all and many have died. I'm not willing to give up on the idea yet though. Some of the possible causes of the failure are;
Transplanting the carrots (they don't really like to be moved) or transplanting them too young.
Over watering (I admit I went overboard on the watering because they were right beside the door)
No morning sun.
So next time I will either plant advanced seedlings, or seed into the tubes and I will move the whole thing to a spot that gets morning sun.
The carrots have not grown at all.
The marigolds around the bottom look great though.
Potato towers
I have had some success with potato towers though. The basic theory is the same as the carrot towers except all the growth comes out of the top of the tower and the height allows the plant to form many more potatoes than it could in the ground.
The potatoes surrounded by compost which is kept inside the wire tube by a newspaper lining.
The potatoes are planted into cardboard boxes full of compost to reduce grass invasion.
Each tower is planted with two potatoes, I have Desiree and Kipfler potatoes in this year.
Today we (and I use the term loosely) put in a water level indicator on the new header tank. I wasn't much help as I damaged my knee putting the header tank in and am currently wearing a very fashionable leg brace. My partner found an indicator kit online, it's Australian made and owned and uses about 50% recycled items. He is so impressed with it that he is going to stock them at work (Rural Energy Supplies).
This is what came in the kit, along with some clear, easy to read instructions; fishing line, a sinker and a fishing line guide thingy.
Then the instructions are pored over by all involved.
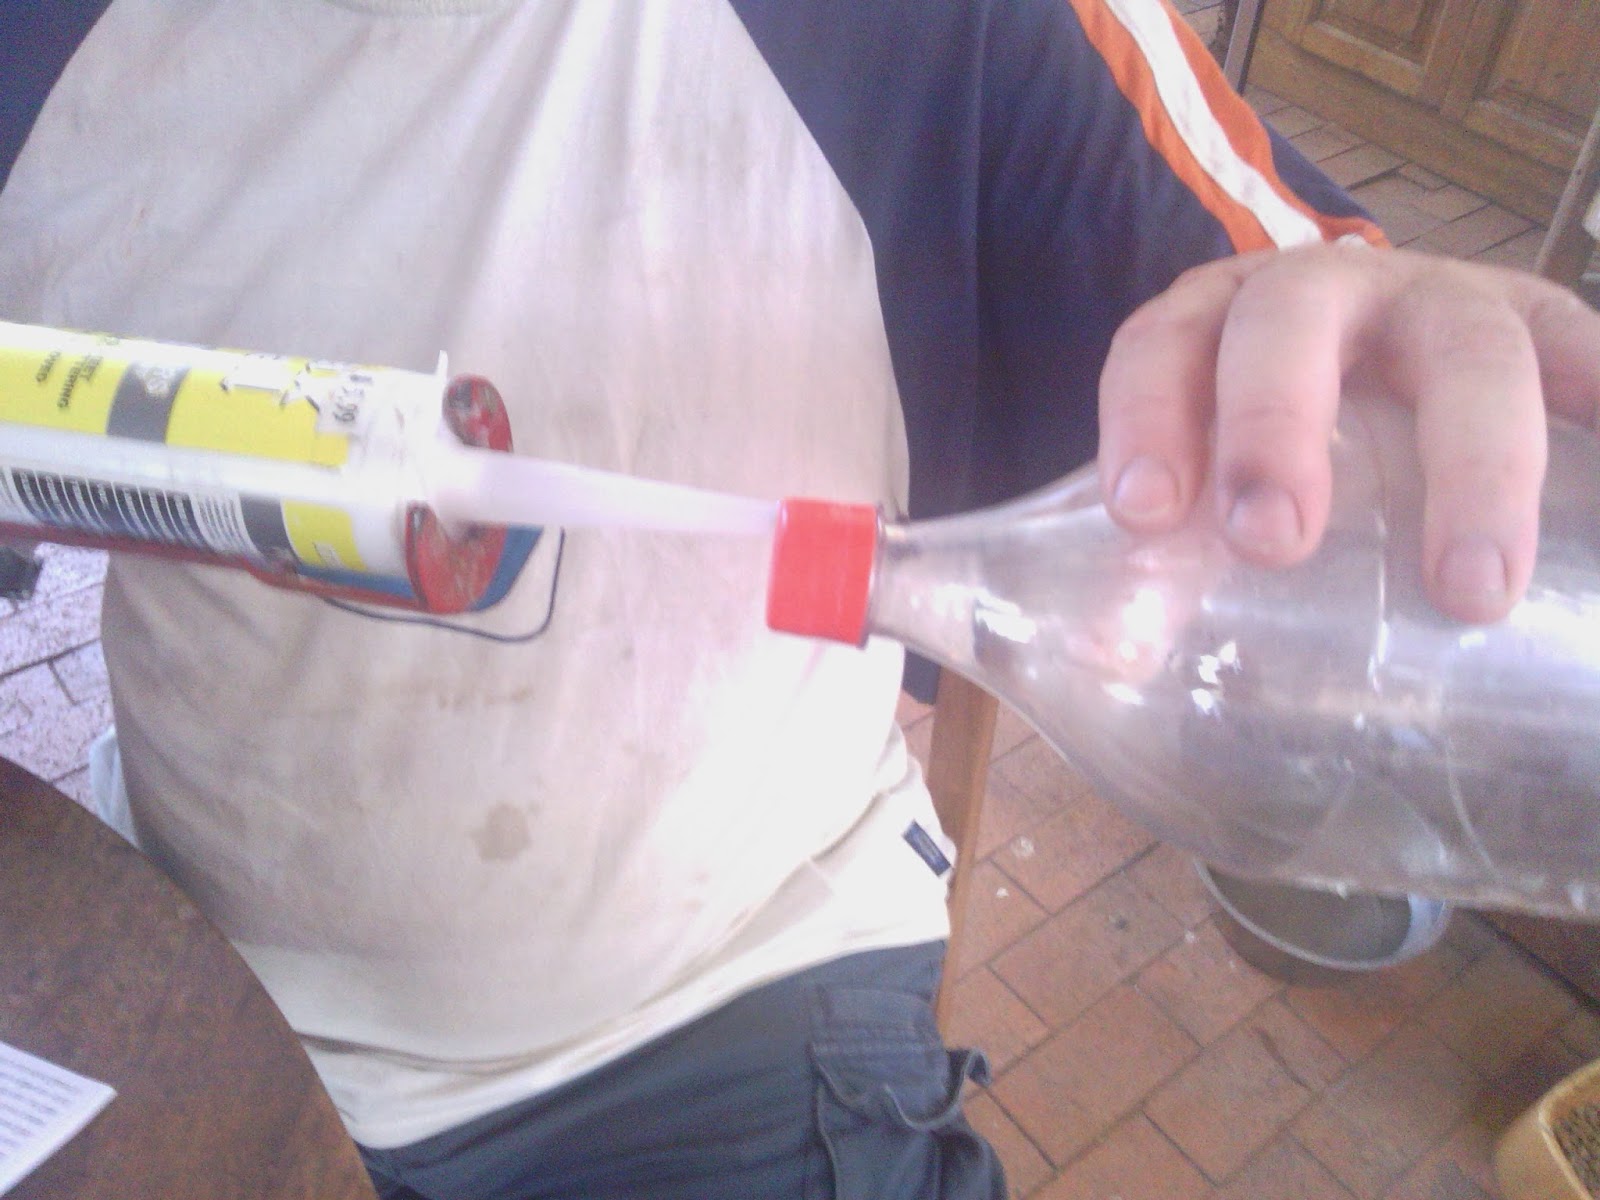
The basic idea is to take a coke bottle and a milk bottle; seal the coke bottle up so it's air tight and fill the milk bottle with sand and water.
The coke bottle is properly sealed up with silicone
The milk bottle is filled up with sand
The sand-filled bottle is then topped up with water
Fishing line (supplied) is then passed through the little guide thingy (supplied) and one end of the fishing line is passed through a pre-drilled hole in the top of the tank. As our hole in the top of the tank was on the opposite side of the tank to the inspection hole we had to spend a long time swearing and cursing while trying to hook the fishing line inside the tank with a piece of bamboo.
The fishing line end inside the tank was then passed through the handle of the milk bottle and tied to the coke bottle float. The milk bottle was then lowered into the bottom of the tank.
The coke bottle float in the tank
Finally the sinker was tied to the outside end of the fishing line so it hangs at the current level of the water in the tank. To avoid frustration it is really important to remember/write down/tell someone what the measurement is when measuring the water level inside the tank so it can be transferred to the outside of the tank.
Measuring the current water level
The final result.
Now I can check the water level of the tank as I walk home from work, instead of climbing the ladder, unscrewing the inspection hatch and looking in, or smacking the side of the tank; I am very impressed.
Everyone who keeps chooks has occasional unexplained deaths in the flock, I had some a few months ago; I had 'chook sat' another small flock for a few weeks at my house last New Years, and I (stupidly) didn't keep the two flocks separate enough. They were in different but adjoining runs. Some of the other flock died (two of them) and I lost six from my flock. Since then I have had one or two getting sick for no apparent reason.
The symptoms ;
Weight loss with no loss of appetite (I wish).
Cloudy eyes with no running or ulceration.
A limp develops in one leg followed by a drooped wing and staggering gait.
Eventually the chook is paralyzed in the legs and one wing and develops a scoliosis (curved spine) with the head twisted.
Even at the later stages the chook is bright with a good appetite and wants to live. Because it only appears very occasionally since the first six deaths I had thought it was something they ate or a tick causing it and tried changing their brand of mixed grain and watching what goes into the house scrap bucket, I have limed the chook pen and shelter repeatedly and replaced the mulch in the deep litter yard. Although it doesn't explain the other flock's deaths, I also decided it could have a genetic cause as I haven't introduced any new chickens into the flock for five years; the whole flock is interbred to a large degree so I may have inadvertently introduced a genetic flaw, so I introduced a new rooster (an Austrolorp) and got some fertile eggs from other sources to bring in some new genes.
The chooks who were sick got to live inside, in a box (changed twice daily) and were fed a special ration of chicken crumbles, rolled oats and chopped herbs (comfrey, parsley and stinging nettle, also chick weed in winter) to boost their weight gain. All of them eventually died, until one night I had a dream; I watched my flock suffering from this disease, suffering paralysis and losing weight ,one by one they died and as I woke up from this nightmare I heard a voice say 'Mareks'. The first thing I did when I woke up was to google Mareks (because that's what we all do with nightmares, right?). I found that the symptoms are a pretty close match to what my chooks had but that the age range was too big (the usual age for chooks to die of Marek's is 1 - 10 weeks) and the rate of death was too low (most flocks suffer 70 -80% loss).
Marek's is caused by a herpes virus that attacks the nerve endings and sometimes the eyes and skin and usually results in death. Even though my chooks were only occasionally suffering and the sufferers were of different ages, I decided that it was probably Mareks.Some more reading about Marek's you might find interesting.
My daughter, who is studying Veterinary Technology at uni, text me one day with a link to a research study into Herpes treatment; apparently St John's Wort has shown promise as a herpes treatment in humans and other mammals, it was worth a try with avians too. I picked up a bottle of St John's Wort tincture from our local Co-Op and had it ready to go when the next chook got sick.
Wobbles is a four year old hen who suddenly became paralyzed. I treated her as usual but added 1 ml of St John's Wort and echinacea tinctures to her water a day as well. After a week she regained most of her motor function and is back to laying and running free in the yard, although as tinctures are made with vodka, she retained a deep love of anything alcoholic (hence the new name, Wobbles).
The clip below is of Tonto, he is six months old and his first symptom was the staggers as the video shows.
The clip below is from YouTube and it shows another chook suffering from Marek's.
I treated Tonto with the same diet and medication as Wobbles and he is now on his first day back in the yard. He is a bit weak and wobbly (another one) but he seems to be recovering.
If you have Marek's disease in your flock, give the St John's Wort treatment a shot, it might save a few lives and we can gather some anecdotal evidence for it's use.